Showing posts with label furniture redo. Show all posts

Monday, February 25, 2013

Palet Ottoman tutorial

Pin It
A couple of months ago I snatched onto a great rectagle palet from work. I was beautiful! The wood looked great but more importantly the top was almost solid. I knew right away it would be the perfect project. I had decided it would become an ottoman.
Now my problem was finding the right fabric and getting the foam. Thankfully both were on sale this last weekend at JoAnn's. So my Presidents day was spent buidling my new ottoman. It turned out fantastic. I really like it but my boys love it- all 5 of them! ;-)
There are several tutorials on Pinterest. Here is what I did.

Step 1: I used spray insulatin foam around the edges. I didn't want to feel the wood pressing through the edges of the foam. The insulation foam said it would take 8 hrs to set but it was good to go after just a couple of hours. I was really glad. I didn't know how long my boys would resist the temptation to play on it again. It was too cold to put outside.
Step 2: After the insulating foam came the batting. I just used some remnant batting to put over the top and around the edges. Then I placed the camping foam on top of that. One side note: I bought a foam pad by the yard at Joann's but it is much cheaper to use a mattress foam pad. Yeah, a DUH! moment.
Step 3: turn the palet upside down on your fabric.
Step 4: Stretch the fabric tight and staple it to the bottom.
Work all the way around. For each side I started in the middle and worked my way out.
Step 5: I used some left over canvas to finish off the bottom. I love the clean underside.
See, so much better than the rough edges of wood and fabric.
Step 6: Add the plates for the feet. Home depot to the rescue.
Step 7: Screw on your feet. I haven't done anything to finish mine yet. I couldn't decide how to finish them or whether to just leave them natural....
Step 8: sit back and enjoy your new furniture! My boys love this new addition.
I think decided to paint the feet red. What do you think?
Pin It

Thursday, September 13, 2012

Headboard bench

Pin It
Remember this post? Well here is the finished project.
Miss Kaylyn painted it a wonderful red. I love red! And this just looks amazing!
Now her sweet sis has in mind for us to make one for her.
Of course I still need to make one for myself too. That will have to wait until our deck is on, I don't have anywhere to put it right now.
Pin It

Tuesday, September 11, 2012

Pallet Patio Furniture

Pin It
Earlier this summer I made these for my friend.
She desperately wanted some patio furniture. I had several pallets just begging to be transformed into something wonderful. 
I simply cut each one in half and added some industrial casters.
Top them with some beautiful cushions and you get some lovely furniture.
Perfect for enjoying the sun with friends on the deck.

Pin It

Saturday, August 4, 2012

Headboard to bench...

Pin It
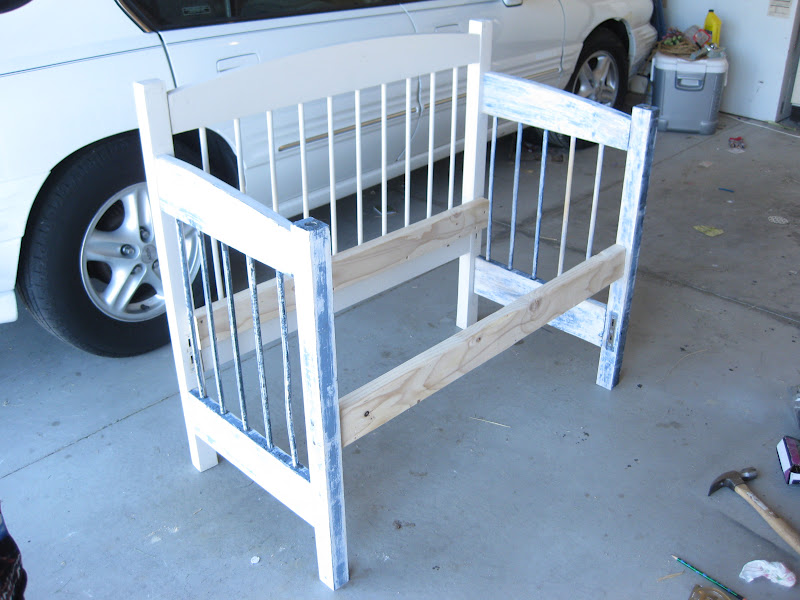
 My neighbors had these headboards out for the trash for a couple of days. I tried to resist the urge but just couldn't. One sunny afternoon I found myself trudging back with these in hand...as well as a pallet. ehehehe.
The sat out for a couple of weeks but this last week Kaylyn and I finally made it to this little project.
 Turning the headboards into a bench. I was a bit worried with the long spindles. I wasn't sure how the sides would look. After about an hour and a few dollars we managed to turn those headboards into something grand.
 I love that we went with the slotted seat rather than a solid one.
And LOOK Jeff, Kaylyn is even using power tools!!!
Yep! It passes the little boy test.
Now Kaylyn plans to paint it a barn red. It will match her pallet patio furniture that we made.....hmmm come to think of it, I don't think I ever posted about those. Maybe I will do that next week. ;-)!
Pin It

Thursday, July 7, 2011

A day of Projects....

Pin It
I love being able to finish odds and ends. Days when I don't have to go anyway and can just spend time finishing whatever comes to mind...those are the kinds of days I enjoy. 
From recovering my mom's swing.....

 to adding a bit of color in my garden....
 these beauties will grow about 18 inches tall plus nice and round in shape.
 Dear hubby especially likes the bold colors.....
 After our morning walk my friend and I even added a bit of color to her garden. She is admittedly a bad gardener. She would say her thumb is more brown than green. We'll work on that. Gardening doesn't have to be hard if you know a few tricks.
 We added a couple of day lillies to the ground then filled her planter with impatients and ivy. I think she was thrilled.
 Adding just a few plants can make a big difference. Just wait until they really start to fill out.
They are just beautiful.
It's a good day!
Pin It

Wednesday, May 25, 2011

Patio Swing Redo....

Pin It
About 10 yrs ago my wonderful parents gave us a lovely patio swing for Christmas. We have enjoyed it so much. Long summer hours swinging with my boys, reading a book, or just watching them play. It's such a comfortable swing.
Remember when I recovered the cushions last summer?
Well, shortly after finishing them my dear son ran and jumped on the swing in a frantic attempt to escape the puppy chasing him. A lot of laughing ended in WOAH!
After so many years of weathering the canvas base lost it's strength and split in two. Thankfully the cushions protected his knees from the cement.
The swing was showing wear in other places as well.....
I decided to put it aside until this spring. I just couldn't get myself to toss it. It still had great bones and just needed a little TLC. Besides my growing urge to recycle.
I checked on new canvas but realized a canvas drop cloth would be cheaper than fabric from the bolt. Plus, it would be already hemmed. After a few rough measurements I finished sewing slots for the bars to slid into. Unfortunately I learned the base to the swing have been welded together. I was able to take the back bar apart and thread the fabric through the opening I had sewn. The rest of it would have to be hand stitched. It wasn't too bad. I just spent the evening on the floor watching t.v. while I stitched. My biggest concern was the strength of the stitch. I used full strength cross stitching thread. Then crossed my fingers and reassembled everything.
Ahh, much better!
The rusted frame was an easy fix with a bit of spray paint. I used a textured paint that dear hubby likes better than the original. My dear friends came over and we visited while he swung gently on the swing. Yep, it survived. He gave it a good test run. Thanks Jeff!
My cushions are faded pretty good already but it is still comfy.
Now Mr. M can join mom on the swing during the hot summer weather- I'm determined summer IS coming!
The swing is always SAFE!
Yep, there's still many more years of enjoyment in this lovely patio swing. 
Gotta show it off...
Pin It

Wednesday, May 4, 2011

Trash to Treasure...

Pin It
I find myself looking at "trash" in a whole new light. 
While out shopping with my friend I picked up a bottle top. My friend wondered if I had lost my mind. She asked what I was picking up a bottle top for. I told her I planned to use it on a hair bow. Her response was "uhm, ok!?" I think she still thought I was crazy.
Well, this is what I had in mind...


I spray painted the bottle top metallic, added a princess sticker and placed it in the center of ribbon.
I originally had it like this...
but I felt it was missing something. I think curling some of the ribbons was just what it needed.
My other great find was a nightstand. I didn't get a before picture taken, just picture 1970's brown with brass....
I actually picked this up for my friend. Now I am WAY jealous. I should have kept it for myself. I'm sure I could have found a spot for it...somewhere. ;-p

Kaylyn finished this herself. She said she would never have done this before but now, she can't wait for the next project.
She added the feet. I'll let you in on a secret...
They are fence post tops!
I love Love LOVE it!
and it only cost about $25!
It's amazing what a fresh coat of paint can do!
HookingupwithHoH

Pin It

Thursday, April 7, 2011

A boys nightstand...

Pin It
If you haven't checked out Annawhite.com you should. She provides great instructions and how to's on building simple furniture. My dear friend was in need of a nightstand for her little boy. Check out what we made with her patterns.


Kaylyn love it. I have to agree. It is perfect for her son's room. We are adding little touches bit by bit. Now she is off to find the perfect lamp and clock.
I made one for Ty's room but haven't finished it. I can't decide for sure on the finish. Don't worry, I will show it off too. Perhaps I can finish it this weekend.....
Pin It

Tuesday, March 15, 2011

Thrift Store Nightstand....

Pin It
Remember this nightstand I picked up for my sister?

I finally finished it.
What do you think? I started painting it black but it wasn't going well. I decided on this chocolate brown. I spray painted the handle black and added the legs. I had to glue the legs on one at a time so they took the longest. I think it would look lovely in a shabby chic white with brown glaze too. 
I hope my dear sis likes it. She will be here this weekend so I'm keeping my fingers crossed. Of course, it's not a big deal to change it if needed.

***UPDATE***
My dear sis L.O.V.E.D it! And her friend was ever so jealous. YEAH!
lil luna link party button
Pin It

LinkWithin

Related Posts with Thumbnails