Showing posts with label homemade gifts. Show all posts

Monday, January 6, 2014

Santa ornaments

Pin It
Project 2 of 52
Have you seen all the fun things you can do with pop tabs? 
The list is growing longer and longer. 
Here is another....
 They were a bit messy but easy.
Gather your tinsel, bulbs, ribbon, pop tab, and a bit of glue.
Turn on your favorite movie and enjoy while you mindlessly stuff the tinsel into the bulb. 
I tried different "tools" to help with this but ultimately it came down to my fingers. Tucking, tucking, twisting and tucking. When the bulb was full I just cut what was still sticking out the top. 
Put the cap back in place.
Then tread the ribbon through the pop tab and glue around the belly of the bulb.
See, nice and cheery.
I made several up one night while hubby watched old Star Trec episodes on Netflix.
I used these for teachers gifts this past Christmas. They all loved them.
Pin It

Thursday, February 7, 2013

Bath Fizzies....

Pin It
With cold and flu season upon us I thought it would be perfect to try making my own fizzies. We used to use these all the time, from the store though. I haven't seen them for a while but making my own is so much cheaper and E.A.S.Y!!! 
Here is the original post.

And the how to...
pour about 2 cups baking soda in a bowl. Add enough water to make a paste. Add a little at a time to make it feel like putty.
Add your essential oils. I have the Breath from doTerra. It is great for sinus issues.
Eucalyptus, Lavendar, and Rosemary are some other suggestions to use. Add 40-45 drops total.
Mix well. Pour into cupcake wrappers and let dry overnight.
Pop 'em out and store in a Mason jar or some other container. I left mine in the wrappers to help the not break up in the container. 
Then just pop one in the shower and let the oils steam away your stuffy nose....plus help to relax you!
Pin It

Wednesday, February 6, 2013

Marble Earrings

Pin It
This idea came from a combination of pinterest posts. One about shattered marbles the other of marles made into earrings....why not combine the two?
 I'm sure someone has already figured this out but I still love it!
 I plan to add these to our PTA Santa shop. What little boy wouldn 't think it totally awesome for mom to wear marbles as earrings?!
They all turned out cool but the blue were just my favorite. They are so pretty!
So here's the how to.
Supplies:
Marbles (got mine from the $1 store)
Gem glue or superglue
earring hooks
Bead caps and small rods

Heat the marbles at 450 degrees for 20-30 minutes. (I did 20 but some of them didn't shatter as much as would have liked. I will do 30 next time).
Remove from the oven and immediately immerse in ice water. Let sit until cool. You will hear them cracking. I did have one split in half but that's it. They are tempered glass so the crack but not really 'shatter'.
Thread the rod through the bead cap and glue onto the marble. Let dry completely. Make a loop on the end of the rod then just add your earring hook.....
TA-Daaaah!
They work out to be less than $0.30 each!
Pin It

Monday, January 28, 2013

Homemade Hand Cream

Pin It
This is the best hand cream I have ever used. My sweet mother in law gave me a jar of it for Christmas. As a nurse my hands are always getting washed. Washing away all the germs and along with them all my natural oils. Add to that, living in the mountain desert and you have the perfect recipe for ultimate dryness.....
Until now!
Now I have the perfect recipe to replace the moisture and keep my hands soft, even at work.
Ingredients:
16 oz Johnson's Baby Lotion (it must be this brand, any scent but this brand)
8 oz Vitamin E cream
8 oz Vasoline
  
 Just place it in your mixer and whip it nice and smooth.
I picked up some great little jars from Target....hmmm, guess it makes quite a bit more than I thought. Mason jam jars work great too!
Place the cream in a zip-lock bag.
Cut a small piece off the corner and you can easily squeeze it into the container of your choice.

Print this little tag to give with it and you have just made someone very happy!
Click on the picture to download it.
ENJOY!


Pin It

Thursday, January 24, 2013

Homemade washcloths

Pin It
Each Christmas our PTA has a Santa Shop for the kids to do some Christmas shopping of their own. The kids love it and get to learn about money and giving all at the same time. 
The problem this year was the stuff the company sent us was a lot of crap. Other items were spotted at the Dollar Store. *ugh* Really?!
So as frugal moms we said we can do better. So throughout the next year we are on the lookout for clearance items and fun gift ideas the kids can shop for. I am super excited! Just seeing the ideas and deals we have found already I think this will be the best Santa Shop ever!
Even my sweet hubby is watching out for toy deals. He picked up some great Lego sets for 1/4th the original price. SAWEET!~
I decided to focus my crafting efforts on the Santa Shop this year as well. I have several ideas and have others started.

Homemade washcloths are simple to make.
Put with a scrubbie and voila~ one great gift for mom or grandma.
They take about an hour each to make, maybe a bit more.
So during any down time; watching a movie with the family, waiting in car pool, waiting at the Dr office, waiting in car pool....I just pulled it out and do several rows. I have about 10 made already. I think I am gonna try to do about 30. It has been fun to try a couple of different patterns too. Such a  fun, easy, and portable craft. It feeds my addiction and fills a need at the same time. Perfect!
Check back for the next project next week. 
If you have any ideas I would love to hear. Just LMK! ;-)

ETA: This pattern came from a little book I picked up at Joann's but here are a couple of freebies some lovely ladies have shared. I am in love with the Waffle Crochet Spa Washcloth. It is simple and fast. Just my style!
 Waffle Crochet Spa Washcloth
Dishcloth
Pin It

Thursday, November 1, 2012

4x4 Snowmen

Pin It
My sweet friend and I finally got to craft again. We have both missed our crafting days so much. For me they help to keep me grounded. I love having a day I can create. A day to beautify my home. A day to be with friends. Yeah, mom's need that too!
 I took advantage of the leftover 4x4's from the deck.
Simply paint them white. 
I wanted a rough look so 1 coat did just dandy.
Then a dab of black for the coal eyes.
And something to resemble a carrot nose. I am not much of a painter so this added to the "rough" feel.
The scarves were just a 3 inch strip of fabric.
Then I measured around the 4x4's. They were about 14 inches around.
A simple rectangle that was 14 inches wide, seamed together, the a slight hem at one end gave me a nice little hat.
I tied it with a bit of ribbon then snipped the top end to give a fringed look.
Using a sharpie I added eyelashes and eyebrows and accented the carrot nose. 
I love them! They were simple and turned out great. 
This weekend I hope to get the Halloween down and these cuties out on the front step. 
My favorite holiday is just around the corner. Horray!
*sigh*
Days like this are wonderful to the soul!

Pin It

Thursday, September 13, 2012

Headboard bench

Pin It
Remember this post? Well here is the finished project.
Miss Kaylyn painted it a wonderful red. I love red! And this just looks amazing!
Now her sweet sis has in mind for us to make one for her.
Of course I still need to make one for myself too. That will have to wait until our deck is on, I don't have anywhere to put it right now.
Pin It

Tuesday, September 11, 2012

Pallet Patio Furniture

Pin It
Earlier this summer I made these for my friend.
She desperately wanted some patio furniture. I had several pallets just begging to be transformed into something wonderful. 
I simply cut each one in half and added some industrial casters.
Top them with some beautiful cushions and you get some lovely furniture.
Perfect for enjoying the sun with friends on the deck.

Pin It

Tuesday, June 19, 2012

Burlap Americana Banner

Pin It
I saw this pattern at my sisters house, loved it, then loved it more when I realized I had everything waiting for me at home. 

 The burlap was for some other project long forgotten. Now I had new life to give it. Thanks to my cricut I cut vinyl stars then used painters tape for the stripes.
Then we headed out to the driveway to spray paint.
I happen to have metallic blue, it was perfect. Just a hint of sparkle for the stars.
Red stripes with the soft brown burlap showing through.
In the end....It was a great hit. I love it. My front door decor is coming together. I have a hard time with garlands around the door although I absolutely love them.
Burlap and the old Red, white and blue....classic Americana.


Pin It

Monday, May 14, 2012

Temple Picture

Pin It
My dear friend just celebrated her 13th birthday. Her first and most wanted gift was a framed copy of my temple picture. Made my day to hear that. So we set off to make it for her. I had an old frame. We took the picture out of it and added trim of our own so we had a chunky frame.
I used metalic spray paint to paint the mat from blue to gold.
The frame was a bit uncooperative but we got it to work out.
The great thing about shabby chic look right now is it hides any imperfections in the building process.
In the end we loved it. Glue the trim all together, rough up the edges, finish off with a sealer and
Voila!
Oh, and Ms. Katlyn loved it too! Happy Birthday Katlyn!
Pin It

Tuesday, August 30, 2011

Mason Jar Soap Dispensors

Pin It
I love these mason jar soap dispensers! I wanted one from first sight. I however didn't wanna pay the price for just the lid. So I did what any self respecting crafter would do, I made my own.
I grabbed a mason jar and started to cut a hole in the top. Not a tough job but I needed a wide one and wanted to limit the number of sharp edges.  Needle nosed pliers worked great to widen and smooth out the hole.
I had a bottle of Bath and Body works foaming kitchen soap to use. The top was great for a smooth finish. I just super glued the rim of the pump to the flat lid.
Add a little silicone to help seal the pump and the rough edges. Hot glue works well too. Make sure to let this dry completely.
Add a bit of paint for the finish of your choice. I would have preferred a hammered nickle finish but of course couldn't find that spray can (until I finished the project!) hidden at the back of the shelf. 
Black would have to do for now.
I tried a matte gold too. Not bad but I like the black or hammered nickle better.
I love them. And they work great. I'm putting this on my Christmas gift list. I am shooting for a homemade Christmas this year. Dear family, you'd better get your wishes in when you can!
Love, Love, LOVE it! It looks amazing on my sink.
Linking up:
lil luna link party button

Keeping It Simple


Pin It

Saturday, August 27, 2011

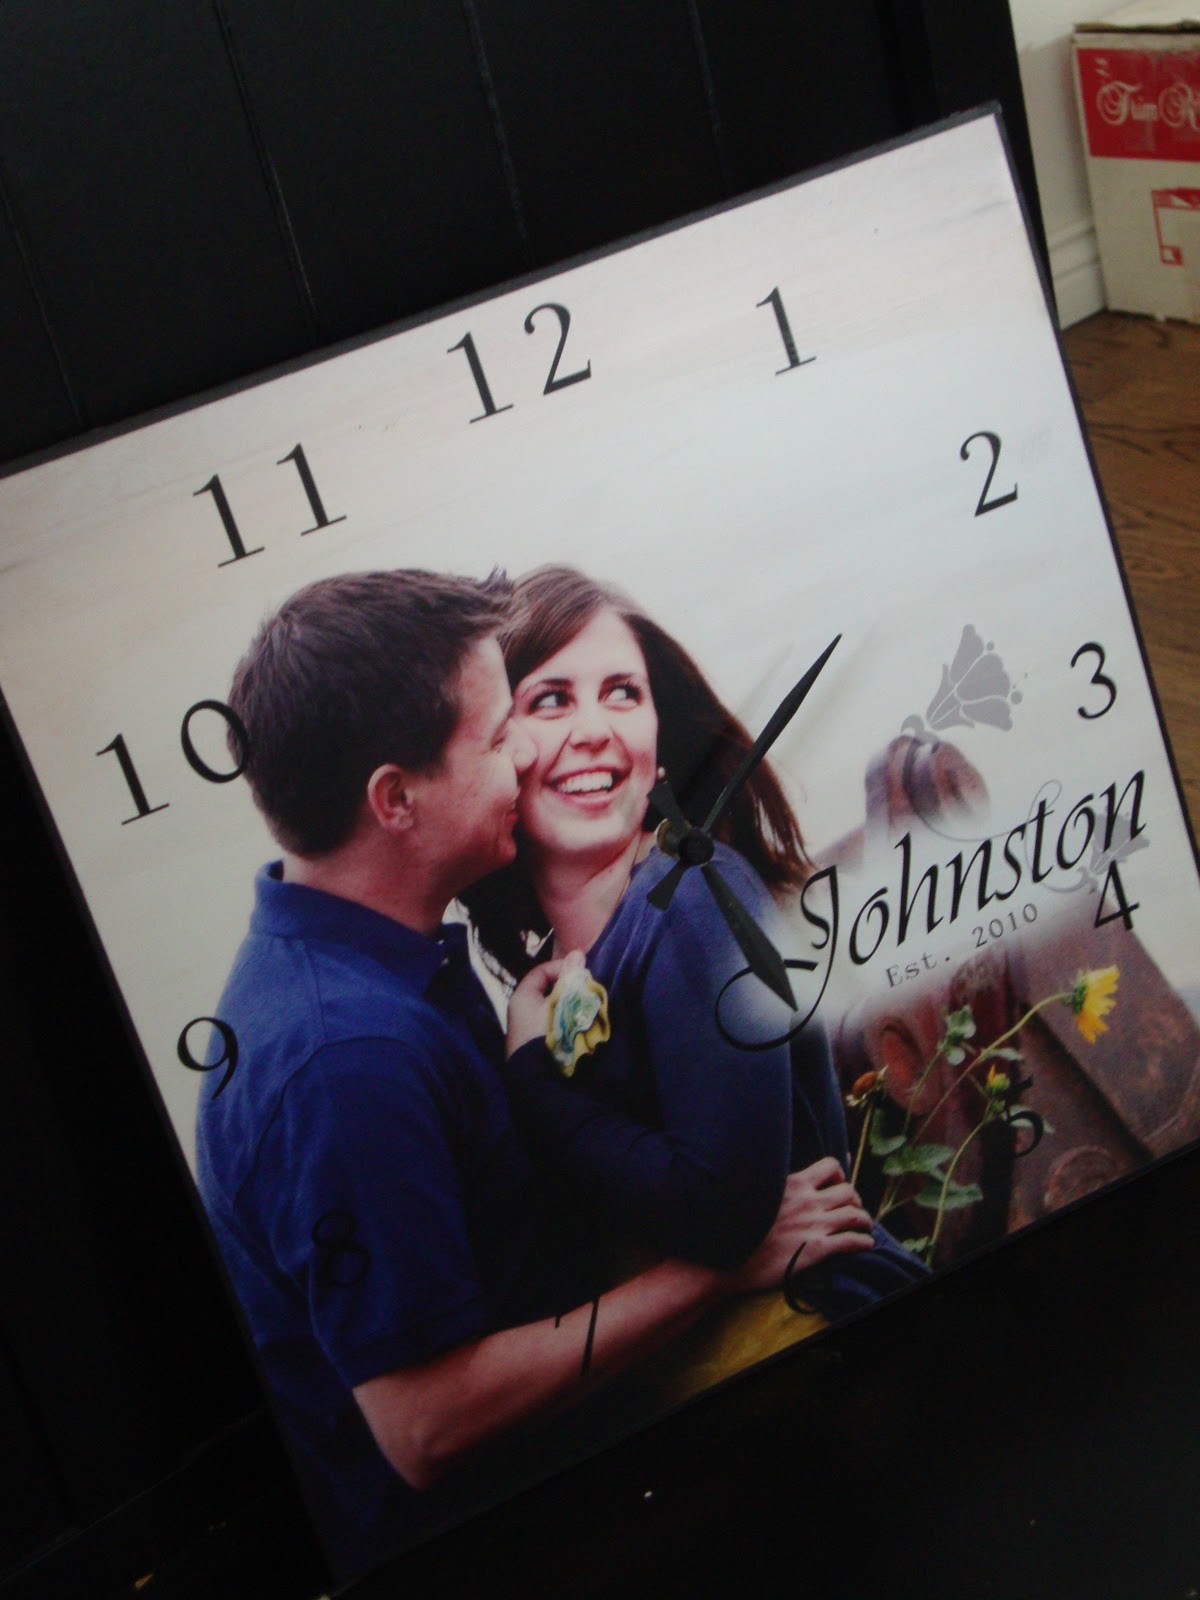
Picture Clocks

Pin It
I love this. I have something for clocks, we have several but I'm sure I could find a spot for this one too. Or better yet, add it to the homemade gifts list.

Pin It

LinkWithin

Related Posts with Thumbnails